Atlassian

The ultimate guide to data classification in Confluence

Share:

We’d imagine your Confluence is home to hundreds, if not thousands, of pages. Right now, do you feel as though you have the right tools and processes in place to protect and manage all that information?

If the answer is no, don’t worry! This guide will walk you through everything you need to know to manage data classification in Confluence. In fact, this is the ultimate guide. It’s a long one, so we’d suggest grabbing a coffee and making yourself comfortable. :coffee:

From native functionality within Confluence to the Atlassian Marketplace apps that extend and enhance existing functionality, today we’re sharing all you need to know about how you can classify and control your data.

We’ll also cover how data classification can fit into your organization’s wider Data Loss Prevention (DLP) strategy. Essentially, we’re aiming to bring you everything you need to keep your data safe and sorted in Confluence.

Confluence: A bit of background

In case you’re not yet using Confluence and are doing a little initial research, we’ll give you a speedy introduction. In a nutshell, Atlassian’s Confluence is one of the most popular document management tools out there.

We describe it as a supercharged, centralized knowledge base, where teams share information in the forms of pages. Focused on enhancing collaboration and teamwork, Confluence is a great tool when used in isolation, but it really excels when used between teams of people. :trophy:

We’ve seen organizations generate anywhere between a few hundred and tens of thousands of pages every month. And as the amount of content grows, the way your information is managed, stored and shared becomes ever-more critical.

A key question is this: How do you know that all the data contained in your pages is appropriate to be shared in a collaborative platform? In most cases, the information is likely to pose little risk to your team or organization. But some documents are more sensitive (think employee records, legal documents or financial data) – and you need to make sure you can put safeguards in place to protect these.

One of these measures should be data classification (no surprises there!). So let’s get started.

In the next section, we’re going to deep dive into data classification and why it’s so important. We’ll then focus on how you can bring data classification to your Confluence.

Your guide to data classification

Let’s start with the basics first.

What is data classification?

Data classification is not simply sticking a label on your information. Instead, it’s a hierarchy of levels designed to help you identify and categorize your data based on the content and its perceived risk or sensitivity.

You can use a range of criteria to choose your data classification levels. These could include:

  • Level of sensitivity
  • Risk to your organization if exposed 
  • Regulatory standards or requirements linked to specific data types (e.g. special category data)

Once you apply classification levels to your information, you are then in a better position to start managing how your teammates and other stakeholders access, share and use it.

Data classification is just one practice in wider risk management, compliance and information security processes. (We’ll touch on this later when we look at Data Loss Prevention strategies.)

Your organization will almost certainly have document management and information security policies already. So, when you begin exploring how to classify your data, refer back to these policies to ensure your processes align with your organization’s wider approach. If in doubt, talk to your Legal, Information Security, or HR teams for further guidance.

Putting in place data classification may sound like a lengthy or complex process, but it really doesn’t need to be. In reality, if you’ve chosen simple classification levels, your team has bought into the process, and if you have the right technology supporting you, it should be fairly straightforward to maintain. Once in place, data classification provides long-term protection of your information and supports a culture of data sensitivity and consideration amongst your teammates.

And, as you’ll discover, we’ve got a heap of guidance to help you set it up in Confluence. We’ll start by explaining how to choose the appropriate data classification levels.

How should you choose your data classification levels?

Levels sit at the heart of data classification. These will often be driven by an organization’s document management policies or industry regulations, and many companies will operate a simple three or four-level classification structure such as the one below.

[]

We commonly see levels like this:

  • Public: Information that poses no risk to the organization if disclosed
  • Internal: Information that poses low risk to the organization if disclosed
  • Restricted: Information that poses a medium/high risk to the organization if disclosed

Generally, we’d encourage you not to create too many levels. Three or four are often sufficient for most organizations to manage their data effectively, and simple enough to encourage whole-team adoption. It’s worth bearing in mind, though, that various regulations and bodies provide different guidelines for data classification.

The GDPR, for example, uses these four levels of data classification:

  • Public data
  • Internal data
  • Restricted data
  • Confidential

The UK Government has its own unique structure:

  • Official
  • Secret
  • Top Secret

Whilst in a completely different sector, Apple has created a classification framework for files created on devices which support data protection:

  • Class A
  • Class B
  • Class C
  • Class D

So, what should your data classification levels look like? In our experience, the three most important things to get right are sense, scope, and simplicity.

Sense: Do your levels make sense in the context of your organization and industry? (We doubt many companies would require ‘secret’ and ‘top secret’, for example!) We’d also encourage you to consider that external stakeholders may need to be aware of your classification levels (such as contractors or agencies). This is why universal terms like ‘public’ may be more effective than internal jargon.

Scope: Secondly, do your levels fully cover the range of information within your organization? You should have a clear idea about this if you undertake a data mapping exercise (head down to our ‘Top tips’ for more info on this).

Simplicity: Are your data classification levels straightforward? As we mentioned, a concise range with clear definitions will make it easier for your teammates to adopt and sustain.

[Tips]

Top tips for implementing a successful data classification strategy

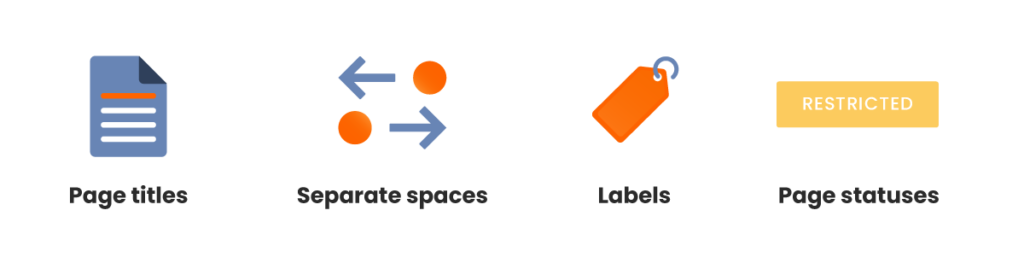
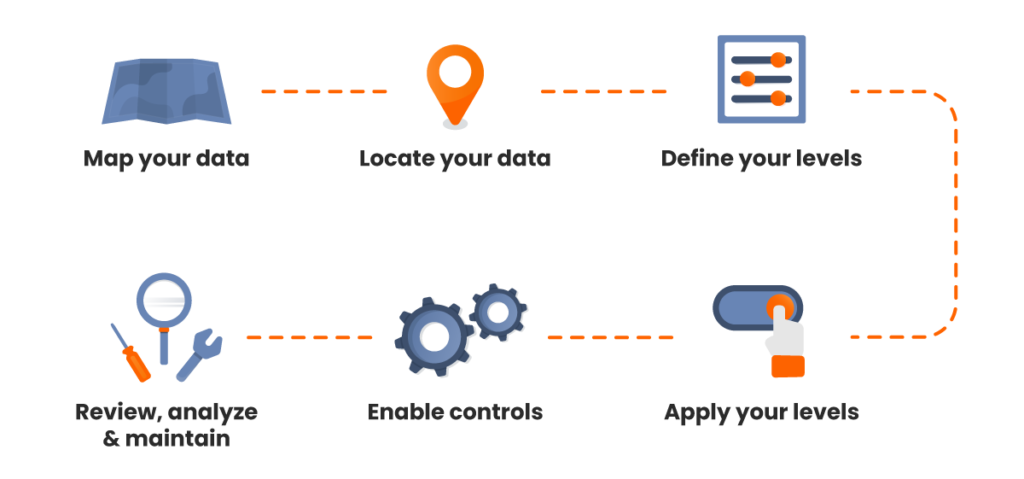
Data classification hinges on a clear understanding of the types of information you possess.

To truly get to grips with your data, you need to spend time mapping, analyzing and identifying it. We’ve included our top tips and tasks to complete here. :white_check_mark:

Do a data-mapping exercise: This is one of the most important steps in the data classification process. You have to understand the different types of data you have to define the various categories or classification levels you require.

It’s a good idea to involve people from various departments to get different perspectives across the organization – and who can provide insights into the legal and regulatory implications that govern how different types of information should be managed. These folks may be from your Legal, Information Security, or Compliance teams.

Locate your data: The chances are, in the context of this guide, that most of your information is housed in Confluence! But it is worth really considering where and how your data is located. Is it stored electronically or physically? Single location or multiple locations?  Do your teammates use personal devices for work purposes? And how is your information protected in each instance?

Define your classification levels: As we touched on earlier, we’d recommend you keep these levels to a minimum because the greater the complexity, the more challenging it may be to adopt across teams and departments. For many companies, three to four classification levels would typically cover most of the types of data you have within Confluence.

After you’ve alighted on the right number of classification levels for your organization, the next step is to define which types of information fit into each category. Here you could provide some general examples to help your teammates (e.g. company policy = internal).

At this stage it’s also valuable to specify how the different classification levels align with your organization’s policies and procedures. Try to avoid jargon or policy-speak. To encourage company-wide adoption, your data classification process must be simple to understand and make sense at all levels.

You should assign some responsibility to various stakeholders to ensure that, once your classification procedure has been introduced, everyone follows it to the same standard.

Apply your classification levels: After defining your classification levels, you can now move on to applying them.  It can help to pose questions to yourself and team. What would happen if the credit card details of your customers were to leak? (We guess a rather loud ‘AGH!’ would ring out). Any data which incurs this kind of reaction must be classed as ‘restricted’, for example.

But on a serious note, if you understand the potential consequences of a data leak or loss, it will help you choose the right data classification levels and the adequate protection needed.

Enable controls: Now it’s time to put the right protections in place. This may include access control and sensitive data detection – both features available in the Compliance for Confluence app (and which we explore in more detail here).

Analyze and maintain: This last step is critical to maintain high standards of data classification and management. Our world is constantly changing, so your data classification processes also need to evolve in response to changing threats or improved knowledge.

Regularly review your data classification process and perform regular audits, to assess whether your data classification system is still fit for purpose.

How important is data classification?

The answer to this is simple: Very!

But as this the ultimate guide to data classification, we should probably elaborate a little. Whether you have 100 or 100,000 pages in your Confluence, you and your teammates need structure and consistency in order to manage and protect all that data. At a base level, data classification is important because it establishes a system for managing this very scenario, right across your organization.

However, data classification’s value goes beyond the day-to-day information access and management.

Let’s start by stepping back and looking at the world in which we’re all working today.

Recent stats around data loss and breaches are, frankly, terrifying. We cover how data classification supports DLP strategies in the next section, but we’ll just share a few numbers first. Did you know that up to 94% companies who experience a data breach never recover? According to research compiled by Truelist, it can take almost nine months for organizations to identify and contain a data breach – and many never regroup from the resulting impact.

We’ve also seen fairly recent changes in legislation, such as the General Data Protection Regulation (GDPR) back in 2017, which has seen organizations across Europe refocus their attentions on data protection. Across the pond in the US, meanwhile, the California Privacy Rights Act came into force in 2020, with four other states now looking to introduce ‘GDPR-inspired statutes’ in 2023.

These new regulations, coupled with regular reports of high-profile ransomware attacks, data leaks and increasingly sophisticated hackers, mean we’re now in an era where information security is (or should be) a top priority for organizations big and small.

Within this landscape, employees, customers and partners will (or, again, should!) be asking companies how they will protect their data. A powerful data classification process should be one of your answers.

So, we’ve set the scene. Let’s now explore the value of data classification in a little more depth:

  • Data classification enhances awareness and assessment skills: Data classification is an important process because it forces you to analyze the significance of each and every piece of information you have. During this process you’ll have to ask yourself: ‘What is the worst thing that could happen if this information became public?’ This level of questioning is not dissimilar to a data protection risk or impact assessment.
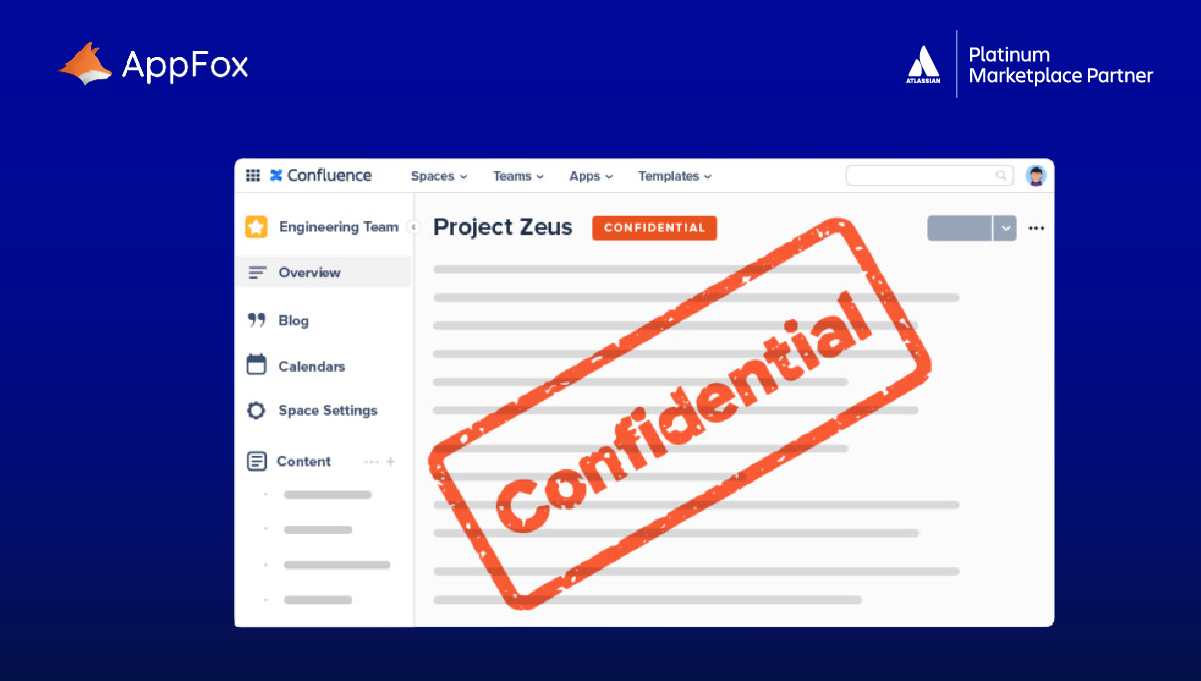
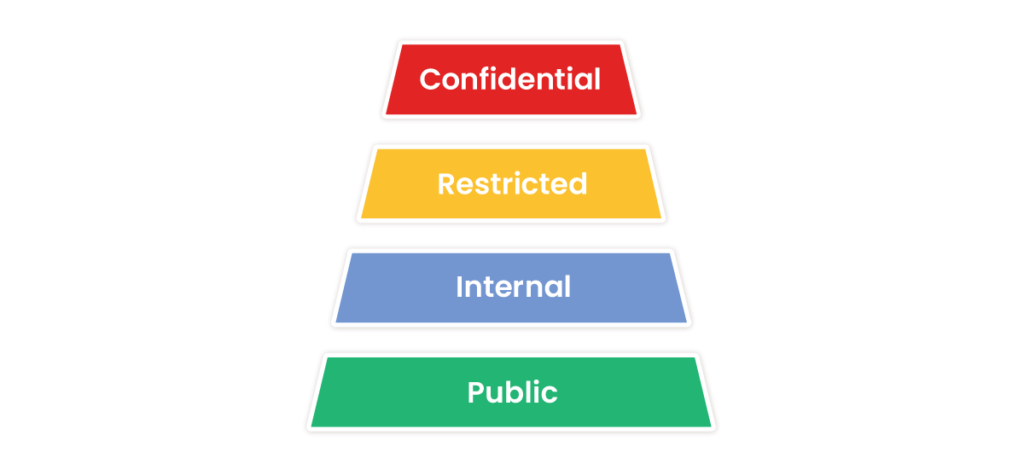
  • It encourages a culture of sensitivity and confidentiality: Some data simply should not be shared outside of a few key team members. From salary details to business plans, sensitive data must be protected and access controlled. When you formally classify data like this as ‘confidential’ or ‘high risk’, it reinforces the importance of protecting it amongst your team members, and helps everyone to consider how they access and use such data (if at all). Crucially, you can then take action to protect it.
  • Encourages accountability: Following an assessment and implementation of data classification levels, teammates will be more aware of the type of data they deal with and its value. It also helps them to understand their duties in protecting data from leaks or breaches.
  • Your may unearth some hidden risks: By taking the time to review your data, there is a chance you will find sensitive information that you were previously unaware of. Whilst this can be unnerving, it does mean you can take action and safeguard it from loss or disclosure. 
  • Reduces the risk of liability: Data breaches can incur legal or financial liabilities. Data classification will help you identify higher risk information so you can put the right safeguards and controls to protect it. This minimizes the risk of exposure or disclosure which could result in legal action, financial penalties and reputational damage. (Nothing major, then :scream_cat: )
  • Protects your intellectual property: Content such as project proposals or partnership agreements can become critical if not appropriately secured. Even seemingly innocent data can reveal valuable information to people outside of your organization if it is lost or disclosed.
  • Establishes consistent processes: Ultimately, a robust and well managed data classification process establishes a framework for handling data in your organization. All team members should be confident as to which data they can access or use, and equally sure identifying which data needs greater restrictions or protection.
  • Supports working towards regulations and accreditations: Whether you’re looking to become ISO certified, achieve other regulatory accreditations, or are simply completing a data protection audit for potential clients, it’s vital to demonstrate you have robust information security and compliance processes. Data classification is just one way to evidence this.
  • Provides an opportunity to optimize and improve content: Once you organize, categorize and classify your data, your Confluence (or other platform) will be a much cleaner, more secure and more efficient placer to work! All together now: Tidy Confluence, tidy mind. :pray:

Hopefully we’re all on the same page after completing this section: We know what data classification is, how you can choose your levels, tips for implementing it and why it’s such an important process. Now it’s time to go on step beyond data classification, and take a look at wider DLP strategies.

What’s DLP, you ask? Read on…

How does data classification support Data Loss Prevention (DLP) strategies?

We’ll cover it all in this next section.

What is Data Loss Prevention?

Data Loss Prevention (DLP) encompasses the actions, tools and methods we can adopt to prevent the unauthorized disclosure of information. In other words: It’s how we try to stop data from being leaked, lost or stolen. Data classification should be a key part of your DLP strategy.

A quick clarification first. We use the following terms interchangeably when discussing data protection, but they’re all slightly different:

Data leak: Information is shared or exposed outside of your organization, and with those who are not authorized to see it. Data leaks are often accidental or non-malicious. They range from human error (say, someone inadvertently forwarding sensitive data over email), to software or database vulnerabilities.

Team training and robust data management and protection processes (including data classification!) are two key ways to prevent against data leaks. In tandem with this, ongoing system maintenance and security controls are vital.

Data loss: The irreparable loss of data which has been either removed from your system (whether accidentally or through malicious activity) or destroyed (this could be via a hardware failure, power outage or environmental factors).

To mitigate the risk of data loss, both physical and cyber security controls are essential (think threat protection, detection and response tools), alongside robust back-up and disaster recovery procedures.

Data breach: Whereas data leaks and losses refer to information leaving your systems, a data breach is when an external entity enters into them. Often, this is the result of a targeted and malicious attack.

At the time of writing, IT Governance reported there had been almost 700 data breaches alone this year, with over 600 million records compromised (220m were the result of a Twitter breach, reportedly 2023’s largest incident to date).

What should your DLP strategy include?

When implemented effectively, a Data Loss Prevention strategy should help to reduce the risk of the above. Each organization will have unique requirements, but as a rough guide, your DLP strategy should encompass:

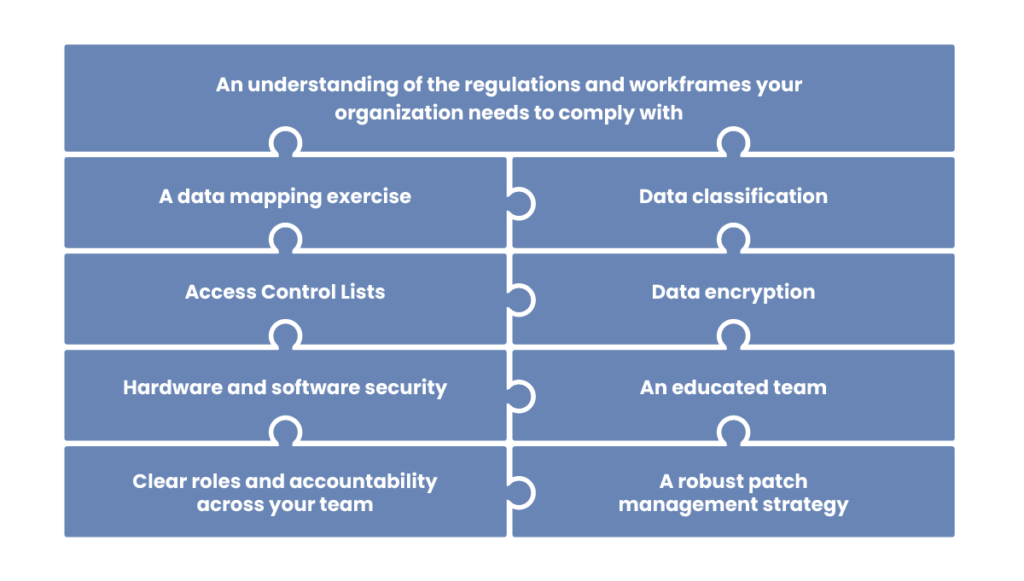
  • An understanding of the regulations and frameworks your organization needs to comply with: From general regulations (like GDPR) to the more niche (say sector-specific certifications), you need to be clear on these requirements.
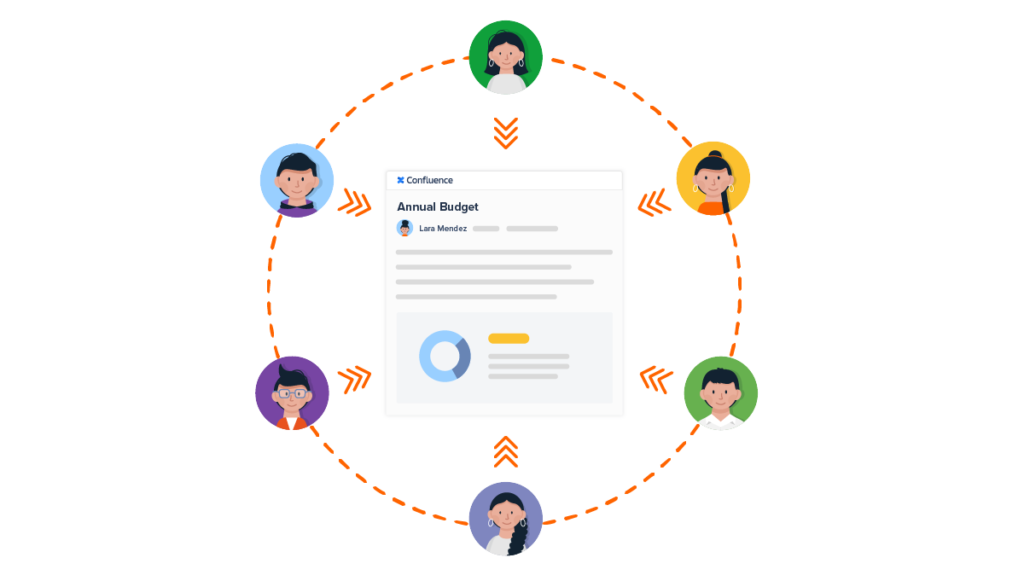
  • A data mapping exercise: Where is your data stored? How is it used? Who has access to information? How does it flow in and out of your organization? This should include a special focus on sensitive data. This may be a lengthy process, and should involve stakeholders across your organization. Data mapping is also a crucial first step for data classification itself.
  • :star: Data classification :star:: Yep, here it is – the star of today’s post! Once you have mapped and identified your data, you need to apply classification levels to it in order to manage and protect it. (If you skimmed over the last section, head back there now.)
  • Access Control Lists: Also known as ACLs, these are a set of rules which determine who (or what) has access to a certain system, object or data. This could include which software or third-party apps users are authorized to install on company hardware, role-based access and restrictions, or websites which teams are forbidden from accessing.
  • Data encryption: All data should be protected by encryption, both in transit and at rest.
  • Hardware and software security: We know this is a real catch-all term, and we could write an entire guide based solely on security tools and processes. But today we’re going to keep the focus tight on data classification, so we’ll just include this as a brief mention.
  • A robust patch management strategy: Some of this may be automated, and some may be dependent on your team manually updating their devices and systems.
  • Clear roles and accountability across your team: For example, who is your Data Protection Officer? (This is a requirement of the GDPR – other regulations may specify different roles).
  • An educated team: We’ve mentioned this in relation to data classification already. We cannot emphasize enough the need for team buy-in and awareness. This extends to your wider DLP strategy.

Interestingly, despite the prevalence of cyber attacks, there has been a drop in businesses maintaining even the most basic information security practices. According to a recent UK Government report, the number of companies using password policies has dropped from 79% in 2021 to 70% in 2023, whilst only 66% are using network firewalls today (compared to almost 80% in 2021). These should be core processes and tools within any organization’s DLP, yet it seems many companies are risking loss, leaks and breaches by not including them.

According to the report, cyber security has dropped down on many companies’ priority lists. It is suggested that other concerns, such as the economy, have overtaken it. It’s tough out there at the moment but, please, if you’re one of these organizations, boost your information security and data protection back up close to the top if you can!

Why is DLP important? 

It feels like every week there’s a new horror story about data breaches. From reputational damage, to the impact on victims, the repercussions of cyber attacks are far reaching. And with threat actors becoming increasingly sophisticated (or shameless), a strong DLP strategy has never been more important.

  • It may save you from financial ruin: We’re being a tad over the top there, admittedly. However, the average global cost of a data breach in 2022 was a mind-blowing $4.35m according to research compiled by Truelist. Organizations may have to pay fines and compensation to victims, alongside paying staff overtime, hiring contractors or implementing new systems or software. The same research claimed that 51% of businesses close within two years of a data breach.
  • It may also save you from significant time and resource: The UK Gov report found that larger businesses are particularly impacted by data breaches in this respect. 37% needed extra staff time to deal with the fall-out from cyber attacks, and 32% said they have had to implement new measures to prevent future incidents.
  • Protect against internal theft or leaks: The external threat actor is universally feared. However, there is also a risk of security threats from the inside. Knowingly or unknowingly employees might mishandle data or disclose it to external parties. According to Verizon, 28% of attacks to data were caused by insiders. It can be hard to spot internal mishandling of data, but DLP strategies can help to improve internal access controls and team awareness in order to mitigate these risks.
  • Maintain company reputation: If you get your data protection policies right they can enhance your brand reputation as a trustworthy and reliable organization amongst employees, partners and customers. Data loss prevention supports the protection of critical data, and helps to reduce the risk of negative publicity and loss of revenue that inevitably follow data breaches. 
  • Ace your next audit:  Accountability is all time high in today’s working world. Almost all organizations appointing new vendors will want to see completed security and data protection questionnaires. Regulatory bodies may insist upon regular audits and health checks. And in the case of non-compliance with regulations like the GDPR, for example, there can be fines of up to 4% of annual worldwide turnover, and instructions to cease processing.

What role does data classification play in DLP?

Let’s start with the data-mapping and identification.

In doing this, your team may uncover sensitive data lurking somewhere unexpected. Or you may find that a previous third party (perhaps an agency, client or partner) still has access to some of your systems or accounts. Whatever surprises (good or bad!) you unearth, you’ll be in a much stronger position to implement both data classification levels and your wider DLP tools and processes once this first exercise is complete.

When you apply data classification levels to your information, it also encourages you to refer back to your organization’s policies. You can make sure your DLP strategy aligns with them and other regulations.

And once your data classification process is in full swing, you can generally be more confident that your data is being controlled and managed in a sustainable way. Confidential data will be protected by access controls and restrictions, and all team members should be clear on what your classification levels mean. This, in turn, should ensure that the risk of data leaks is lessened.

By the end of this section you should be in no doubt: Having a robust data loss prevention strategy is very, very, very important for all organizations. And data classification is a critical part of any data loss prevention strategy.

So let’s get on to the good stuff! Now we’ve covered data classification and DLP in detail, let’s shift our focus to Confluence. How can you apply data classification to your information and begin protecting your spaces and pages? :shield:

Applying data classification to Confluence

Does Confluence support data classification?

We’ve come to the heart of this guide. All the processes we described, the benefits and the considerations – how do we embed them in our day-to-day work using Confluence?

We could shout about Confluence all day – we’re huge advocates of it, and we live and breathe it in our day-to-day work! But it’s worth noting that Confluence in itself does not have the native functionality you need to create a truly robust data classification process.

To implement a really sustainable, automated and secure data classification framework, you ideally need to look beyond Confluence’s built-in features and instead seek out a trusted Atlassian Marketplace app.

But if that’s not a possible option for you at this stage, we do have some ideas and guidance as to how you can use native Confluence macros to achieve some degree of data classification.

Using built-in features to implement data classification in Confluence

Page titles: Option one is to use page titles for data classification. For example, you might write ‘Project Proposal 2023 [CONFIDENTIAL]’, or ‘Organization chart [INTERNAL]’.

At best, these titles may dissuade other teammembers from viewing or sharing the documents themselves, or at the very least make them pause before doing so. But without access controls or automatic restrictions, this isn’t a sustainable or secure solution.

Separate space: At the other end of the scale, you could create a new space, purely for confidential or high risk documents. Now on the one hand this is effective as this space can be locked down – so only specified users are granted access. But there are a few issues. For starters, you’d need to manually grant permissions to new starters where appropriate, or retract access for leavers.

It would also need to be a universal space for ALL confidential documents – so employee records may sit side-by-side with financials, and succession planning may rub shoulders with customer card details. Essentially, all data would be available to all members of the space – and this may not always be appropriate. The solution would be to create spaces for each team or document instance, so an HR confidential space, Legal confidential space, and so on. But that’s a lot of spaces – and you’d have to ensure you could still maintain consistent approaches across them all.

Labels: Labels are key words which you can assign to your Confluence pages to categorize them (or, at a push, classify them). For example, you could label pages as ‘Confidential’.

One of the advantages of using labels is that you can easily find all related pages which have been tagged with the same name. You can also browse all labels across a space or site, and view which labels are the most popular.

Whilst this helps you to organize your pages, it doesn’t provide the access control or automated actions that a dedicated data classification process does.

Page status (Cloud only): Atlassian suggests using these macros to flag at what stage of the approval process a page is (such as ‘Draft’, ‘Ready for Review’ and ‘Final’), but in theory you could use this status functionality to apply data classification levels instead. Confluence enables you to rename or to create custom page statuses, so you could relabel them in line with your levels (‘Internal’, ‘Restricted’, Public’, and so on).

However, this functionality does have limitations. Page statuses only display when you open the page itself (as opposed to displaying on the side menu so you can see statuses at a glance). Other limitations include the fact that you cannot filter based on status, nor base any automation or workflows on them.

So, statuses can enable you to essentially label your pages – but beyond that, you cannot use them to support more robust data classification processes.

The above features can all provide some form of data categorization, but they’re not designed to be scalable as your organization grows, or your data management needs evolve. They also all require some degree of manual effort, which also opens up your data handling processes to human error.

‘So… how can I implement more robust data classification processes in Confluence?’ you ask. The answer lies in custom-built apps, which have been created specifically with data classification in mind.

Using a third-party marketplace app to implement data classification

As you may know, the Atlassian Marketplace is awash with awesome apps which extend and enhance the power of Confluence (there are apps for all Atlassian products, in fact).

There are a few Marketplace apps available which can unlock data classification capabilities within Confluence. But there’s one in particular which offers you a truly end-to-end classification process.

Introducing Compliance for Confluence. :tada:

Introducing Compliance for Confluence

Created by us (hello), Compliance for Confluence has been specifically designed to prevent data loss and help you to control, manage and secure your information.

Help protect your data in Confluence with the Data Loss Prevention app, Compliance for Confluence

A little background first.

Confluence is an amazing platform for teams to collaborate and create on – as we’ve probably already said countless times in this post. It does, however (and like all software) have limitations. In the context of today’s topic, those limits are around data classification and protection. Luckily, there are a host of vendors who develop apps to extend and enhance Confluence’s native capabilities. One of those is us, AppFox!

We’ve created Compliance for Confluence for teams to do what Confluence’s native functionality can’t yet: To classify, manage, and protect your data.

In this section, we’ll start with how you can set up data classification in the app, and then dig a little deeper into how you can control page access using data classification levels.

After that, we’ll list all the key features that can help you (there are a lot… and they’re pretty great). And we’ll finish up with how you can find and install Compliance for Confluence.

Ready?

How to set up data classification in Compliance for Confluence

Compliance for Confluence comes with four classification levels as standard, but you can have up to 10. We’d always recommend having as few levels as possible for a simple and sustainable structure, but the app has been designed to be flexible so you can evolve your use over time.

To set up your levels, and to customize them, you first need to log in as a Confluence Administrator. You can then follow these simple steps:

  1. Head over to the ‘Settings’ cog in the top right-hand corner and select ‘Compliance Configuration’.
  2. Navigate to the ‘Classification Levels’ tab and use the table to configure the following options:
    1. Name: So ‘Public’ or ‘Restricted’, for example. Level names will then sit at the top of your relevant pages and inside the level lozenge.
    2. Color: You can assign a color to each level. Something universally recognized is often a good shout – think green, orange and red, for example. But if your organization uses colors in a more unique way, you can go for it here!
    3. Description: Context helps your teammates to understand why a classification level is being used. Here, you can add a level description, which is shown when someone hovers over the level (or in the large ‘force classification’ dialog box)
  3. If you need to add more levels, simply click on the ‘+ Add Level’ button.

And just like that, you’re all set up! But how do you apply these levels to your pages?

How to apply data classification levels to your Confluence pages

From an admin’s perspective

If you’re a Confluence Administrator, you have two options here.

Force classification: If you enable this, it means that users have to apply a classification level whenever they create or edit a page.

This is a pretty bullet-proof way to enforce your data classification strategy, and to make sure that no pages are left unclassified (and therefore potentially vulnerable). However, this only works if your users are confident about which level they should assign different types of content – so you need to provide clear guidelines and comprehensive level descriptions.

You can configure forced classification at a Global or Space level.

Default classification: The second option is to set a default classification level which will be applied each time a new page is created or published.

This, again, protects pages from remaining as ‘pending classification’. But it does mean you’re relying on your users to then select a more appropriate classification level at a later stage. Again, clear guidance and policies need to be in place to support your teams in this regard.

Default classification can also be enabled at Global or Space level. Note! Default classification will override the Force Classification feature.

From a user’s perspective

Let’s switch to the user experience. How do you manually apply (or change) a data classification level to the page you’ve just created or are editing? We’ve made it super simple for you.

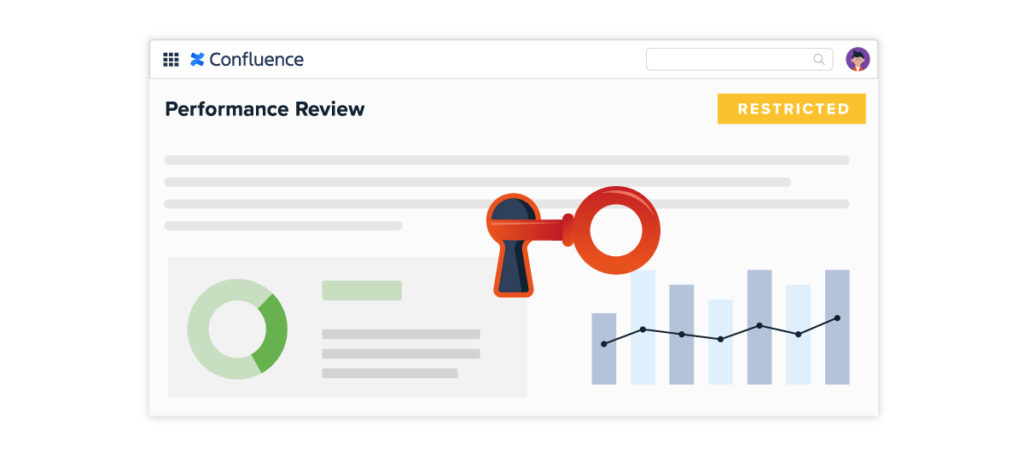
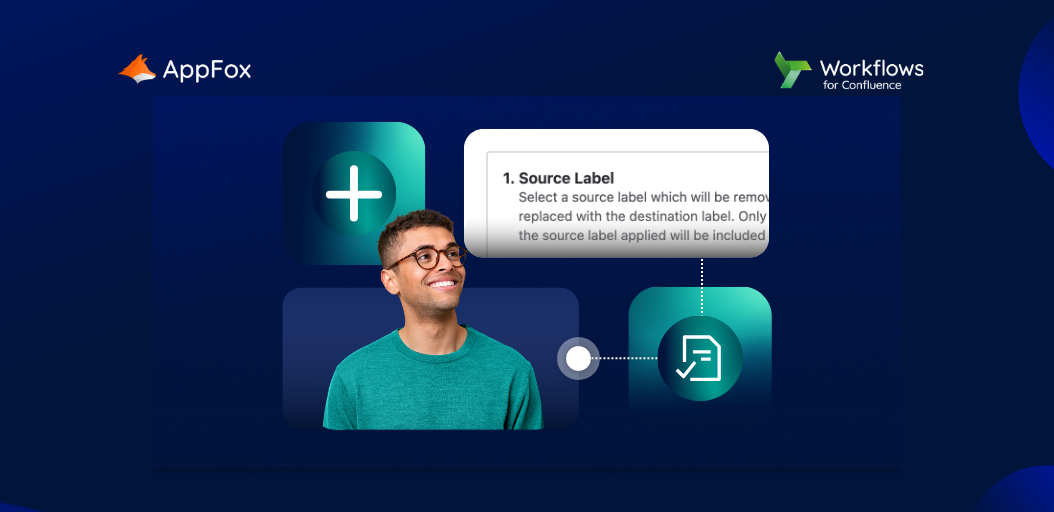
  1. Open the Confluence page you want to classify. Can you see the ‘Pending Level’ indicator at the top of the page?
    Of course, if a default classification level has already been applied (or you’re changing an existing level), you won’t see ‘Pending Level’. Instead, you’ll see the existing classification level lozenge.
  2. Click on the indicator/lozenge to add or change your chosen classification level.
    (If you already had restrictions enabled based on a previous classification level, the page will then refresh to show any new restrictions.)
  3. To see an audit trail of levels, hit the ‘…’ menu and click on ‘Classification History’.

How to control access with data classification levels

If you’re a Confluence Administrator, you can automatically restrict users from accessing pages, based on the classification levels you’ve applied to them. You can grant access to individual users, roles or groups, so you have a high degree of flexibility.

Again, you can manage this at a Global or Space level.

How to manage page restrictions globally:

  1. You’ll need to start off in the ‘General Configuration’ settings in Confluence. Select ‘Classification’, which will appear in the left-hand side Compliance menu.
  2. From here, you want to click on ‘Global Settings’, and then scroll down until you see the ‘Manage Restrictions Globally’ checkbox.
    Now once you tick this box, it will prevent Space Admins from configuring page restrictions at the Space level. In other words, only you, the Site Admin, will have full control of the page restrictions feature.
  3. Next, toggle the ‘Restrict Pages Automatically’ option. This will activate page restrictions across your entire site.
  4. You can then select the Users, Groups, or Roles you want to have access to pages at a specific classification level. Hit ‘Save’ to confirm your selection and this will become active for all pages classified/re-classified after this point.

How to manage page restrictions at a Space level:

Choosing this option means that you give control to your Space Admins. The first step is to make sure that the ‘Manage Restrictions Globally’ checkbox (which you’ll find on the Global Settings screen – see screenshot above) is not ticked. Your Space Admins can now configure their restrictions.

  1. Within ‘Space settings’, select ‘Apps’ and then ‘Compliance’.
  2. You should be able to toggle the ‘Restrict Pages Automatically’ on. If you can’t, check with your Site Admin that they’ve unticked that ‘Manage Restrictions Globally’ box!
  3. You can then go ahead and assign access to your chosen Users, Groups or Roles.

Automatically managing your page restrictions is another layer of protection for your Confluence pages. It means you can be confident, for example, that only particular roles can access ‘Confidential’ data. Crucially, if you change the data classification level of a page, any associated restrictions will be automatically updated.

Key features overview

It would take us all day to go into a deep dive of every feature within Compliance for Confluence. And whilst we love talking about what the app can do for you, we’re betting you might not have the time to read it all. (Plus we have a pretty great Knowledge Base for you right here.)

So, now we’ll just give you a whistle-stop tour of our other favourite features. We’ll start with some of the ones we already looked at (for anyone who skipped those sections!)…

Apply and customize data classification levels

  • Assign data classification levels for your pages. These will sit at the top of your pages, so they’re instantly visible for all users.
  • Apply these levels to pages in bulk to save you time and resource.
  • Customize the name, colour and description of each level to align with your organization’s data management policies.

Restrict access based on data classification levels

  • Restrict access to a page based on its classification level.
  • Automate page restrictions. Once a page level is assigned (or changed) as ‘Confidential’, for example, the relevant restrictions are automatically applied.
  • You can manage these at a Space level, which can be used by different teams to protect and manage pages within their own spaces. Let’s say, that your HR team needed specific restrictions applied to pages classified as ‘Highly Confidential’ within their space. Instead of having to rely on general company-wide access, you can create a custom scheme for them, applied only to their HR space.

Search and view your data classification levels

  • View all your classification statistics on a dashboard
  • Search and filter pages in Confluence, based on their classification levels. Crucially, you can also find pages yet to receive classification levels – enabling you to swiftly identify gaps in your data classification process.

Manage and protect sensitive data

  • Enable ‘Sensitive Data Detection’ – a tool to identify any suspected sensitive data within your Confluence pages. From email addresses to credit card numbers, sensitive data is flagged – meaning you can then decide how best to protect and manage it.
  • Configure the detection tool to run either as a specific one-off activity, or to regularly scan your Confluence for sensitive data
  • Search for sensitive data within specific pages or spaces
  • Choose whether to redact text, or to whitelist it. You can also enable bulk changes.

Ultimately, compliance for Confluence includes all the features you need to establish a robust but simple to adopt data classification process. Beyond that, it also enables you to mitigate data loss and leaks through restricted access, automated actions and sensitive data detection.

A quick note here – some of the features we’ve described above may differ slightly depending on whether you’re using Compliance for Confluence Cloud, Data Center or Server. There’s a neat comparison table for you over here (or, of course, you could just give us a shout).

Take control of your data in Confluence
Get a free 30-day trial through the Atlassian Marketplace or book a demo with our team to see Compliance in action.
Try for free Book a demo

How do you get Compliance for Confluence?

Luckily, this part is also pretty straightforward. Simply search for ‘Compliance for Confluence’ on the Atlassian Marketplace and you’ll find us. There are versions for Confluence Cloud and Data Center.

How to install Compliance for Confluence Cloud:

  1. Make sure you’re logged into Confluence already. Click the ‘Apps’ dropdown and then choose ‘Find new apps’.
  2. Search for Compliance for Confluence and select it. The ‘App Details’ screen will then load.
  3. Click ‘Try it free’ to start installing your app.
  4. Now just click ‘Close’ in the ‘Installed and ready to go’ dialog box and you’re all set!

How to install Compliance for Confluence Data Center:

  1. Log into your Confluence instance as an Admin, click the admin dropdown and choose ‘Atlassian Marketplace’. The ‘Manage add-ons’ screen will load.
  2. You then need to click ‘Find new apps’ or ‘Find new add-ons’ from the left-hand side of the page.
  3. Search for Compliance for Confluence.
  4. Select ‘Try free’ to begin a new trial or ‘Buy now’ to purchase a license. You’ll be prompted to log into MyAtlassian. Compliance for Confluence will then begin to download.
  5. Enter your information and click ‘Generate license’ when redirected to MyAtlassian.
  6. Finally, click ‘Apply license’ and you should be done!

Tips to maintain strong data classification processes in Confluence

We’ll finish up today with a few final pearls of wisdom,

It’s all well and good implementing a thorough data classification strategy to prevent data breaches and legal liabilities. However, this isn’t just a one-and-done activity. You and your team must complement this work with a review and analysis phase of your data classification strategy. 

Regulations, threats and knowledge are always changing. So, we need to keep pace.

Compliance for Confluence will provide you with a broad overview of the Confluence pages that still need classification. This will enable you to prompt colleagues to classify their pages and close all the gaps.

In addition, Compliance for Confluence generates reports for you to review all the Spaces and ensure that everything is classified appropriately. 

You can schedule regular scans to ensure you’re aware of sensitive data housed within your Confluence. And, as ever, crucially you can take steps to protect and manage it.

And make sure to regularly review your organization’s data management policies and ensure you align with their requirements re: audits and reviews.

But the work’s not all down to you. We (the AppFox team) are also continually exploring, innovating and expanding. We’re not ones to sit still, and we’re excited to bring fresh developments and enhancements to Compliance for Confluence, and our range of other apps.

In closing…

If you’ve made it to the end, thanks for sticking around (and great work – this really was the ULTIMATE guide).

You’re probably on the same page as us: Data protection and information security really is of paramount importance – and hopefully you’re now aware that Compliance for Confluence is a valuable tool to support your ongoing data management and protection.

You can get access to a free 30-day trial of Compliance for Confluence via the Atlassian Marketplace. If you have any questions, want to discuss your use case, or would like a personalized tour of the product – book a demonstration with one of our product experts and we’ll be happy to help!

In this article:
Craig Willson
Craig Willson
Craig is a product marketer at AppFox who spends his time helping Atlassian and monday.com users get the most out of their most important (and loved) software. When he's not at work, you'll find Craig spending time with his family, watching football, or out walking his dog in the glorious British weather (aka rain).